+61 438 412 865

ads@a-solution.com.au

LinkedIn

Analysis

Geometric Form fitting

Where you need to know the ovality (roundness, cylindricity, conicity) of a cylinder or ring, or the flatness of a surface plate we use least squares shape fitting routines to determine the best solution. The output may be:

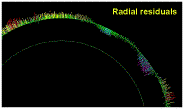
A needle plot of the sample point deviations from best fit surface,
the attitude of the component in relation to other components

Other Analysis may include calculating the shimming or machining parameters for correcting the verticality or seat alignment of machine components or whole machines. (sole plates, machine footing blocks, bearing pedestals).

Dimensioning

We are able to provide dimensions from point to point or from geometric shapes for quantities such as OD, ID and PCD. These are required for reverse engineering or quality audit applications.
Rotational CL or Geometric CL can be used as Reference or Datum. and Fit parameters such as clearances, eccenticity, concentricity, wear effects are also assessed if required.

Scale verification and adjustment in CNC machinery is easily done with our technology to an accuracy of 0.001mm/m.· Traceability of our measurement systems to international length standards guarantees the compatibility of our results with other organizations with such traceability.
Captured 3D Data is capable of transferring into a variety of Industry formats or as text files for value adding design elements by clients.

Levelness and Flatness

Many applications such as machine bed setup require flatness of a surface to be determined and corrections made. Our systems can do this. Because of the 3D technology that we use it is easy for us to determine both Flatness - the range of deviations of a flat surface, and Level - deviations to a plane perpendicular to gravity. Other components can be established at specific relationships (for example perpendicular or at specific angles) to the Flat or Level surface. All relationships, correction parameters, can be displayed graphically, as colour vector plots, or tabulated. Quality of results can be demonstrated by uncertainty fields and assessed against specifications to confirm tolerances. Verticality (<±0.005mm/m) Where you have vertical machine columns, shafts, or any feature we can make these measurements. Our systems enable us to determine the figure for a single vertical component or the relationship of many adjacent components. For a large coupled shaft this may be verticality, and angular and parallel offsets.[/column_shortcode]

Verticality (±0.005mm/m)

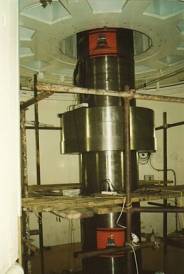
Where you have vertical machine columns, shafts, or any feature we can make these measurements. Our systems enable us to determine the figure for a single vertical component or the relationship of many adjacent components. For a large coupled shaft this may be verticality, and angular and parallel offsets.

Digitizing, Surfacing, Profiling, Scanning

Roundness

Eccentricity